Monday, November 26, 2012

Mexican Lasagna

I made this meal the Friday after Thanksgiving, but I was too busy chasing kiddos (my niece and cousin and cousins-in-law. Not mine. Good Lord, not mine.) to write about it. So I'm writing about it now, instead of doing my homework. I blame Iowa State for my current lack of scholarly enthusiasm. They really shouldn't put a whole week break into the schedule three weeks before finals. They should just start classes earlier and then end at Thanksgiving. That's what I would do if I was the Dean...How am I not in charge of anything? I have so many great ideas.

Meanwhile, back on the topic. Friday my mother- and sister-in-law apparently took a vote that I wasn't invited to and voted for me to be in charge of dinner for everyone.
That's fine. I picked the easiest thing on earth, because I was still in quite the food coma.

I don't know if I have mentioned this on here, but I love Mexican food. American Mexican. Not the authentic kind from Mexico. The kind you get when you mix taco seasoning, hamburger, cheese, and tortillas in any kind of order. And salsa. And guac. And whatever else you like in your Mexican food.

The order that I chose this time was the order that makes it Mexican Lasagna. It's like a taco and lasagna put together. With beef and cheese and onion and cheese and beans and corn and more cheese and CHEESE.
Did I mention it has cheese?
Mmmmm....cheese.
All that stuff in layers separated by flour tortillas.
Yes, ma'am.

I had to make two separate lasagnas - one for the ladies and one for the menfolk. That is what is so great about this "recipe." It's more of a concept than a recipe. You can use whatever you like and leave out whatever you don't like. It's flexible. And tasty. And you'll think so too, because you only use the ingredients you want.

For the men, it was just layers of meat, cheese, and tortillas.
The ladies version also featured black beans and corn. And more cheese.

My wonderful sister-in-law made fresh guac, so I had a heaping helping of that and even put some on top of my lasagna.

I topped my helping(s) with guac, sour cream, more cheese, lettuce, and tomato. It was divine.
I want more now.


Oh, look! A recipe! 

Mexican Lasagna
Ingredients:
1 pound ground beef
1 package taco seasoning
8 ounces cheese, shredded - cheddar, American, nacho, pepper jack, Monterey, etc
Salsa or Enchilada sauce
8 - 8 inch flour tortillas

Optional Vegetables
Green peppers
Tomato
Onion
Black beans
Corn
Anything you would like in a taco

Optional Toppings
Guacamole
Vegetables (see above)
Lettuce
Sour cream
Salsa
Cilantro
More cheese


Directions:
1. Preheat oven to 375F. Grease a 9x13 inch baking dish.
2. Brown ground beef in a large skillet.
3. Drain ground beef.
4. Add taco seasoning to ground beef. Mix well. Set aside, but keep it warm.
5. Prepared vegetables (optional) by cutting into 1/2 inch cubes.
6. Shred cheese.
7. Spread 1/4 cup of salsa or enchilada sauce in the bottom of the baking dish, making sure that entire surface is covered.
8. Place two tortillas in the bottom of the pan, cover as much surface as possible with as little overlap as possible. Cut to fit if desired, but if it curves up the side of the pan a little, that's ok.
9. Layer in 1/3 of meat, vegetables, and 1/4 of cheese
10. Repeat layer 3 times, ending with another layer of tortilla (tortilla, filling, tortilla, filling, tortilla, filling, tortilla).
11. Cover surface of top tortillas with 1/4 cup of salsa or enchilada sauce and remaining cheese.
12. Bake until cheese has melted through, about 15 minutes.
13. Top as desired.

Devour.
Fall in love.
Devour more.

Wednesday, November 21, 2012

Biscoff Pumpkin Cheesecake

For those of you keeping track at home (which is probably no one, and I don't blame you), this post is a day late. I had full intentions of having it up yesterday, but then I found out I didn't have to work today. I did  a  little happy dance, then immediately began packing up to head home and making the 3 1/2 hour drive to Van Buren County. So that is what I was doing instead of making cheesecake and writing this.

If your family is like mine, you probably know exactly who is going to bring what to Thanksgiving dinner, because it is the same thing they bring every year. Everyone in my family has their one favorite dish that another family member makes. For me, it is my Aunt Stacey's taco dip. It's hot. It's cheesy. It's just a little spicy. Yum.

For my sister, it's Uncle Danny's chocolate layer pie. It's got a layer of chocolate pudding, a layer of chocolate pudding with whip cream folded in, and is topped with whip cream. I kid you not, that 80 pound girl can eat an entire one by herself. It's incredible.

But for my Uncle Danny, it's not Thanksgiving without my pumpkin cheesecake. I started making it a few years ago, and since that fateful Thanksgiving day it's an unwritten rule that I will bring the pumpkin cheesecake to every holiday. I'm pretty sure he wouldn't let me in the door without it.

Sorry I don't have any pictures for this one, I only make it for the holidays and I haven't made it yet this year. You're just going to have to use your imagination.

Now usually I make this in a graham cracker crust. This year I am going to make the crust from Biscoff cookies.
Have you tried these? They are so good. They also make this great Biscoff spread. It's delicious. You could sandwich that between tire rubber and it'd taste good.
I'm going to post this Biscoff crust recipe with the warning that I haven't tried this yet. I am substituting it, one for one, into my graham cracker crust recipe. I'll post back tomorrow if it needs to be corrected. Or if you try it, let me know how it goes!

Happy Thanksgiving!

Biscoff Pumpkin Cheesecake


Crust: 
2 cups crushed Biscoff cookies
1/4 cup sugar
1 teaspoon cinnamon
1 stick butter, melted


Filling:
8 oz cream cheese
3/4 cup brown sugar

1 can pumpkin puree
3 eggs

1/4 cup hazelnut coffee creamer, liquid or dry (I prefer liquid)
1/3 cup heavy cream
1 tablespoon pumpkin spice


Directions:
Crust: 
Preheat oven to 375F.
Crush Biscoff cookies in a food processor. Add sugar and cinnamon; pulse to combine. Add melted butter until you have a moist "dough." Press into a pie pan and bake 10 minutes.

Filling:
Preheat oven to 375F.
In the bowl of a stand mixer or in a large bowl using a hand mixer, mix cream cheese and brown sugar. Mix in pumpkin puree and eggs, one at a time. In a seperate bowl, combine cream, coffee creamer, and pumpkin pie spice. Slowly add cream mix, and blend until smooth.
Pour into pre-baked pie crust. Bake 45 minutes, until center is set. Cool to room temperature before cutting.


UPDATE! Here's a picture of the cheesecakes this year. I made them at my in-laws, and, since I don't carry my homemade pumpkin spice blend in my purse (yet), I had to do a little improve.
I used pumpkin spice coffee creamer and nixed the hazelnut and other spices.
Still delicious.
And, bonus! I found a new favorite coffee creamer.
Until I start buying Christmas flavors. White chocolate peppermint? Yes, please.
Anyway, I was in kind of a rush to make these, so I only have a final product picture.


Candied Sweet Potato Pull Apart Bread

My life has been swallowed up whole by Pinterest - wardrobe, decor, and menu. I have chalkboard-painted cookie sheets in my kitchen. I have multiple "upcycled," old-shirt scarves. I have a stash of mason jars awaiting their calling in life.
Something about being on there, it just sucks you in and makes you feel a lot more crafty and creative than you really are. And yeah, 98% of my Pinterest projects end with "it looked better on Pinterest." But it's just so dang addicting.
Anyway...
Lately it seems that I cannot get on the internet, let alone Pinterest, without seeing pull-apart bread. So, I made my own. The idea of this recipe was to incorporate the flavors of one of my favorite Thanksgiving foods - candied sweet potatoes.
It was my first time making bread like this and I made a couple mistakes along the way, so I"ll point those out to you as we go.

Shall we?

(Not pictured, all ingredients, because I may have been making this up as I went along.) 

My base dough for this was 1/2 the recipe for Pioneer Woman Cinnamon Roll dough. I love her recipe for cinnamon rolls. I've made them several times and they always turn out great. 

Start by heating the milk, oil, and sugar over medium heat, until almost boiling. You don't want this to boil. Then, take them off the heat and let the milk cool to....warm. It can't be scalding hot, but you don't want it to be luke warm or cold either. It needs to be warm, like a nice bath. Does that explain it?
I hope so. 

While the milk mixture is cooling, cut the sweet potatoes into about 1 inch cubes. Toss them, just to coat, in vegetable oil and spread them out on a baking sheet. Then, roast them at 400F until they were fork tender and a brown around the edges, about an hour. 

Once the milk has cooled, add one package of active dry yeast. If you buy it in the 4 oz containers like this one, that's 2 1/4 teaspoon - thank you, Google. But first, measure it into a cute bowl that doesn't really serve a purpose other than being cute and holding things that are already measured. But it's so cute! And bendy! And fun! 

 Sprinkle the yeast over the now-warm milk mixture. 
It should get bubbly like this one did. That means your yeast are enjoying their bath. 

 Add 4 cups of flour. It will be a hot (warm) sticky mess, but that's okay. Just cover it with a towel and let it rise for  about an hour.
I hope it's easier for you to find a clean towel than it was for me. When a trip home is coming up, I tend to put laundry off as long as possible. Actually I do that all the time, but my trip home was coming up this time, so I had an excuse. 

Your sweet potatoes should probably be done roasting by this point. If you haven't checked them, now is the time.
If they are nice and tender, go ahead and mash those up. I used a hand mixer, but you could use a potato masher, or your hands, or find a strong man to do it for you. That's what a lady from work would suggest - find a strong man to do any moderately physically demanding task. My friend Emma (Check out her blog. She's really super cool and makes beautiful, delicious things in a kitchen.) would do it herself though. And so did I. And so can you!

 When your dough is done rising, you are going to add another 1/2 cup of flour, 1 scant teaspoon baking powder, a heaping 1/4 teaspoon baking soda, and 1 cup of mashed sweet potatoes. Go ahead and measure those out now. Use your cute bowls again! 
My cup of sweet potato is a little scant. I may have had some for lunch.

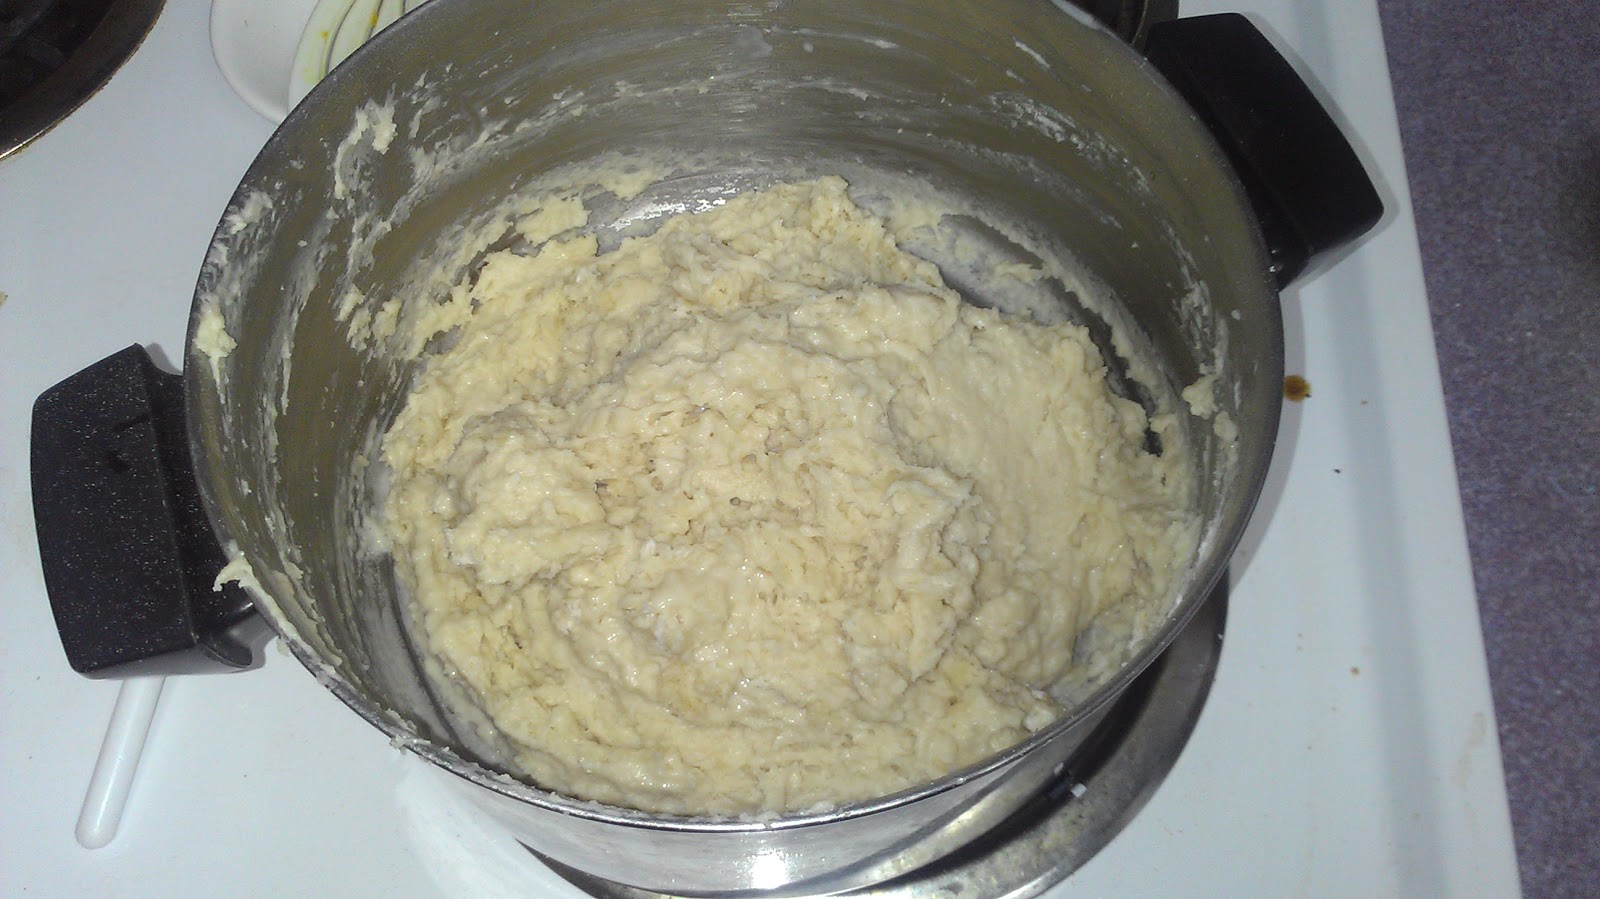
This is what your dough will look like when it's done rising. About twice its original size and still kind of a hot sticky mess. 

Add your flour, baking powder, baking soda, and mashed sweet potatoes. Mix it thoroughly. You could do this in a mixer, but I just used my hands. I recommend using your hands. I really like to use my hands rather than a utensil as often as possible. It reminds me of when I was just a little foodie and my mom let me mix meatloaf with my hands. 

 When you've got it all mixed up, flour your counter and roll it all out to about 1/2 inch with a rolling pin, or find a strong man to do that for you too. Now, here's where I made the biggest mistake. I didn't add any butter. Butter is always the right choice, but I didn't have any so I skipped it. The bread still tasted great, but my layers wouldn't peel apart.
So now, melt 1 cup of butter and pour it over the whole thing. Make sure you cover every bit of surface. 

Sprinkle it heavily with 1 cup brown sugar, 3 tablespoons cinnamon, and 1 tablespoon allspice. Just when you think you have enough, add a little more.
Then cut it into strips. I used a pizza cutter and it made it super fast and easy. 

If you have a loaf pan, now is the time to get that out. I don't, so I used my 8x8 baking dish. It would have been better in a loaf pan, but I am too cheap to buy things and just make due with what I have. 
Whatever you are using, you want your dough strips to be about 3/4 as tall as your dish, so when they rise they don't get too big for their britches. Don't stuff your dish completely full of these. They will need a little breathing room. I left about an inch for them to grow and it worked out perfectly. 
At this point, you could cover it and keep it for one or two days in the fridge. Or you could make it now. That's what I did. 

Bake in a 375F oven for 30 minutes. This won't quite cook it all the way, but that's what we want. 

While the bread is in the oven, make the marshmallow glaze. Melt 1 stick of butter1/2 a bag of mini marshmallows, and 1 tablespoon of vanilla over medium-low heat. Stir it continuously, so everything melts quickly and evenly, and because I am a compulsive stirrer. This will turn into a golden, butter-colored, lava-hot syrup. Keep it warm, over low heat until the bread comes out of the oven. 

After 30 minutes, take your bread out of the oven. It should be really, really close to being done. Carefully, pour your marshmallow glaze over the top. Make sure you get the whole thing covered, top and sides, edges, peaks and valleys. Every bit of it. Especially around the sides, so it sinks in and coats the whole thing. I put some marshmallows on top too, so I could get that toasted marshmallow taste with the marshmallow glaze. If you have any pecans or walnuts hanging around, now it the time to add those too. 
Put it back in the oven for another 5-10 minutes, until the bread is completely cooked.  

Try to refrain from eating it before it cools at least a little. It is covered in molten sugar glaze, which is as dangerous as it is delicious.
I definitely waited until it was completely cool before I started eating it with my bare hands. Not even a taste, because I am Mrs. Foodie Willpower. A model in self-control and self-discipline. That's me. 


See all that deliciousness bubbling up? That's why you want to make sure you cover the entire perimeter. That's also why you don't want to dive into this straight out of the oven.  

If you haven't made a side to take to your Thanksgiving festivities, this a great choice. It is delicious hot or at room temperature. And you can make the dough a day ahead of time then just have to bake it and glaze it the day of. 


Ingredients:
For Sweet Potato Pull-Apart Bread
2 medium sweet potatoes
2 cups whole milk
1/2 cup vegetable oil, plus more for tossing sweet potatoes
1/2 cup sugar
1 package active dry yeast
4 1/2 cups flour, divided
1 stick (1/2 cup) butter, melted
1 cup brown sugar
3 tablespoons cinnamon
1 tablespoon allspice
1 cup pecans or walnuts (optional)

For Marshmallow Glaze
2 sticks (1 cup) butter
1/2 bag mini marshmallows
1 tablespoon vanilla

Directions: 
Preheat oven to 400F.
Cut sweet potato into 1'' cubes. Toss in vegetable oil. Roast until fork-tender and golden brown, about 1 hour. Remove from oven, mash and let cool.
Set oven to 375F.
While sweet potatoes are roasting, heat milk, oil, and sugar until almost (but not) boiling. Remove from heat and allow to cool slightly, to warm.
When milk is warm, not hot, add yeast. Stir until all yeast is wet. Let sit 1-2 minutes.
Add 4 cups of flour and mix completely. Cover with a towel and let rise 1 hour.
Add last 1/2 cup of flour, baking powder, baking soda, and sweet potato. Mix completely using a stand mixer with bread hook or by kneading by hand.
Roll to 1/2 inch on a lightly floured surface. Cover with melted butter, brown sugar, cinnamon, and allspice.
Cut into strips, 3/4 the height and width of loaf pan.
Place strips in greased loaf pan (see above photo). Bake 30 minutes.
For marshmallow glaze - melt 2 sticks of butter, mini marshmallows, and vanilla in a sauce pan over medium-low heat. Stir continuously. Keep warm over low heat until bread is done.
Carefully pour marshmallow glaze over entire surface of bread, making sure to get all the way around the edge. Top with mini marshmallows, pecans, or walnuts (optional).
Bake 5-10 minutes longer, until marshmallows are toasted and bread is done.


Monday, November 19, 2012

Life-Changing Coffee Tip

I just wanted to quickly post a little foodie tip that I got from a friend that has rocked my coffee world.
I've made no effort to hide that fact that I live a caffeine-fueled life. As I speak, err type, I am holding my 2nd cup of the day.
And by cup I mean pot.
So if something changes my coffee world, you can take that coffee to the bank. You can take it anywhere, really. Actually I'd recommend not leaving home without it.
So here it is -
Sprinkle a teaspoon to a tablespoon (depending on how strong you want it and how big your coffee pot is) of ground cinnamon over coffee grounds before you brew them. Then brew coffee as normal.
Holy yum. The brewing process really brings out the cinnamon flavor and it's a great complement to a mild coffee, because it's not coyingly sweet or overpowering. 
Make sure you give it a little try before you add cream or sugar. Usually my coffee is about 25% cream and sugar, but since I started this I've just been adding a couple tablespoons of milk and no sugar.
I should probably thank that friend for the tip...
Thanks, Bay!
...I don't think she heard me....
Well, I hope you like it!

Thursday, November 8, 2012

Apple Cake

Apples and I have a love hate relationship. I love them, but they do not love me back. I can't get enough of that fresh flavor of a Honeycrisp or Gala, but the acidy tartness sends shivers through my teeth, so it's hard for me to eat them raw. It's a truly heartbreaking scenario, I know. The real problem is that they always look so good in the store, all snuggled in their apple crates, just begging me to buy them. And, like a fool, I buy them every time. This weekend I found myself with 3 bags of apples just hanging around! There were apple treats galore in the foodie household: baked apples, Roasted Acorn Squash and Apples, and Layered Apple Cake. 

To make the cake I just used a standard yellow cake recipe, like this one from Smitten Kitchen. It would also be really delightful with a spice cake, then you could probably nix the spices on the apples. Maybe cover them in caramel sauce instead. Or throw on some rum-soaked raisins? Yes, please. 

What was I saying? 

Oh, right. Start with a yellow cake batter. Once you have that prepared, cover and refrigerate it while you ready the other ingredients. 

Take about 5 or 6 apples, any kind you want or have lying around. Peel 'em and slice 'em into nice, thin wedges (about 1/4-1/8 inch). If you have a mandolin slicer, now is the time to get that out. I don't, so I sliced them by hand like a pilgrim. Set those aside too. They'll probably turn a little brown while you are not looking. Don't worry about it. A little enzymatic browning never hurt anyone. 

Mix together cinnamon, nutmeg, allspice, and brown sugar. What the heck, melt some butter and throw that in there too. I mean, you already put a cup in the cake, no need to skimp now. 

Now grease a 9"x13" cake pan. Pour in half of your yellow cake batter. Layer on half of your apple slices, about 2 slices thick. Drizzle half of your melted butter/spice/delicious mixture over the top. 
Top that with the other half of the batter, then your apples, then the rest of your butter mixture. 

Bake it for about an hour, until a toothpick comes out clean. 

You could drizzle on some caramel sauce or dust it with powdered sugar or both, if you have those kinds of things lying around. 

Stand in awe of your culinary prowess. You just made a layer cake.


You are awesome. 
(Side note: You can see in this picture that I didn't put enough apples in the layers, so I have modified this recipe from the version I did to save you from a similar fate. You are so welcome.)


Apple Cake

Ingredients:
Prepared yellow cake batter for one 9"x13" cake
5-6 apples, any variety
2 tablespoons cinnamon
2 teaspoons nutmeg
1 teaspoon allspice
1/2 cup brown sugar
1/2 cup (1 stick) butter

Suggested Toppings: 
Caramel Sauce
Powdered Sugar

Directions:
1. Preheat oven to 350F.
2. Clean, peel, and slice apples into thin wedges, about 1/4-1/8" thick. 
3. Combine cinnamon, nutmeg, allspice, and brown sugar. 
4. Melt butter and add it to spice/sugar blend. Mix well. 
5. Pour half of the cake batter in a greased 9"x13" pan. Layer half of the apple slices about 2 slices thick, to cover the entire surface of the cake batter. Drizzle half of the butter mixture evenly over the apples. 
6. Pour on remaining half  of cake batter, top with another layer of apples and a drizzle of butter mixture. 
7. Bake 50-60 minutes, until a toothpick inserted in the center comes out clean. 

Top as desired. 


Monday, November 5, 2012

Roasted Acorn Squash and Apples

I had a serious case of foodie fever this weekend. Probably because there were so many other things I should have been doing, but a girl's got to eat. I made apple cake, cayenne honey glazed pork loin, two-tone mashed potatoes, and this, the epitome of delicious fall foods, baked acorn squash with apples. Holy yum. Everything about this dish is so fall I want to put a scarf on it and throw it in a pile of leaves (but I won't).

Not Pictured: Vegetable Oil, because I forgot about him. Oops

Start by cutting your acorn squash in half. This is really hard, so a really sharp knife is helpful. I didn't have one, so I just hacked at this until it felt sorry for me and broke in half. 
Scoop out all the seed and ligaments and whatever else is in there. 


Much better. 
Now cut it into wedges and throw them, skin side down, into a baking dish you have had for 100 years and never used.


Isn't it precious?
Now toss them in vegetable oil and put them in the oven while you prep the rest, about 15 minutes.


While the squash is in the oven, core your apples and cut them into wedges. Don't be fooled by the knife sitting there looking like I did these beautiful wedges by hand. There is an apple slicer just out of the camera's view.

Now, combine the butter and brown sugar. I originally started with less butter and sugar, then realized I was kidding myself and added more butter and sugar. It's fall, no need to try to lighten things up now. Leave that for spring.
'Tis the season for hearty foods.

Much better. Now toss in some cinnamon and ginger and mix it some more.

Take the squash out of the oven and bring the apples to the party.

Now just cover everything in butter. Don't be afraid. You've made it this far; it's too late to turn back now.

Put it back in the oven and let it cook until it's fork-tender and your apartment smells like heaven, about 20-25 minutes.

Shamelessly eat it straight out of the pan.

You can tell yourself you are checking for doneness, if that makes you feel better about it.


Roasted Acorn Squash and Apples
Ingredients:
1 acorn squash
2 apples
2 tablespoons vegetable oil
1/2 c butter
1/2 c brown sugar
1/2 teaspoon ground ginger
2 teaspoons cinnamon


Directions:
Preheat oven to 375 F.
Cut acorn squash in half and remove the seeds. Toss in vegetable oil in an 8x8 baking dish. Place in oven for 15 minutes.
Meanwhile, core and slice apples into wedges. Set aside.
Combine butter and brown sugar, until thoroughly mixed. Add cinnamon and ginger to butter/sugar mixture. Mix well.
Remove squash from oven. Add apples. Coat apples and squash with butter/sugar mixture.
Return to oven. Bake until fork tender, 20-25 minutes.

Saturday, September 22, 2012

Pumpkin Granola Bars

Since school is back I need breakfast foods that are quick, easy, and grab-and-go friendly. I usually buy a bunch of granola bars, but they never really fill me up and they're expensive. This semester I've been making my own breakfast cookies and granola bars. Their cheap, easy, and you can make big batches and freeze them. Now, with fall in the air, pumpkin is on my mind.
Here is a recipe that was inspired by a post from one of my favorite foodie blogs My Baking Addiction. If you've never been there check it out. Another woman by my own heart. These granola bars are a great freeze-and-grab option for busy mornings. They thaw out in under 15 minutes, so by the time I get to class they are ready to go.

Pumpkin Granola Breakfast Cookies
adapted from My Baking Addiction - Pumpkin Granola Bars

Ingredients:
3 cups old fashioned oats
2 1/2 teaspoons pumpkin pie spice (Can't find it? Don't want to pay for it? Make your own! Be the master of your granola bar destiny! MBA Pumpkin Pie Spice Blend
1/2 teaspoon salt
3/4 cup light brown sugar
1 cup pumpkin puree
1 egg white
1/4 cup applesauce 
1/4 cup honey
1 tablespoon vanilla 
Add up to 2 cups total of your choice of nuts, candy, chocolate chips, dried fruit, whatever you have lying around. I used chocolate chips and walnuts.

Directions:
Preheat oven to 350F.
Combine oats, pumpkin pie spice, and salt in a medium bowl.
Mix brown sugar, pumpkin puree, egg white, applesauce, honey, and vanilla in the bowl of a stand mixer until smooth.
Slowly mix in dry ingredients. Mixture will be firm.
Spoon by heaping tablespoon onto a greased cookie sheet. Flatten into cookies (these wont really change shape during baking).
Bake 25-30 minutes.

Thursday, August 9, 2012

Double Chocolate Whole-Wheat Cookies

Lately I've been experimenting with whole wheat flour. I bought a bag to make bread, but didn't really like how it turned out, so now I have a bag of whole wheat flour just hanging out in my pantry.
Today I made these double chocolate cookies. I'm not claiming that they are low calorie or anything, just a little better (probably). Baby steps...
I had some friends stop by just as these were coming out of the oven.
Coincidence?
Doubtful.
I got great reviews from them and my husband before I told them that they were made with whole wheat flour. I guess that means these are comparable white flour cookies.
I think next time I'll try peanut butter and jelly cookies.

Double Chocolate Whole-Wheat Cookies

Ingredients:
1 cup all-purpose flour
1 1/4 cup whole wheat flour
1 teaspoon baking soda
1/2 teaspoon salt
3 tablespoons cocoa powder
1 cup unsalted butter
3/4 cup granulated sugar
3/4 cup brown sugar
2 eggs 
2 teaspoons vanilla
1/2 cup chocolate chips

Directions:
Preheat oven to 375F
Cream butter, granulated sugar, and brown sugar in the bowl of your stand mixer or in a large bowl with a hand mixer. Add eggs, one at a time, mixing each in thoroughly. Add vanilla and mix well. 
Combine all-purpose flour, whole wheat flour, baking soda, salt, and cocoa powder in a large bowl. Whisk or sift to combine. 
Slowly add dry ingredients to wet. Make sure that each addition is completely mixed in before adding the next. 
Stir in chocolate chips. 
Scoop into balls and drop on a greased or parchment lined cookie sheet. 
Bake at 375F for 10-14 minutes.

Eat six. 
What?
They're whole wheat. It evens out.
Right? 

Accidentally stuck my thumb in the one in the corner...guess that's mine too. Ooops :) 


Sunday, August 5, 2012

How to Wash the Dishes - A Tutorial

I love cooking, but I hate washing the dishes. This is how that process usually goes for me. 

1. Realize the kitchen is a mess. 
2. Announce to the dog that you are going to do the dishes. 
3. Fill the sink with hot soapy water. 
4. Place dishes in hot soapy water. 
5. Change your mind about washing them. 
6. Tell the dog you are letting them soak and not to give you that condescending look. 
7. Get back on Facebook/Twitter/Tumblr/Blogger/time-wasting-website-of-your-choice. 

Friday, August 3, 2012

Oven-Fried Chicken

Fried chicken is one of my favorite foods, but actually frying anything in my apartment is out of the question. I hate the oily fatty fried smell that hangs around afterwards. Plus it gets in my clothes and hair and...just yuck. I have worked in the food industry, primarily making fried foods, for 7 years and still cant get over that gross stale-oil smell.
Anyway, and more importantly, my smoke detector is just way too sensitive for frying. It goes off when I boil water. I think it would go into a panic and have alarms going of throughout the building if I tried to actually fry something. So, I have been looking for oven-fried chicken recipes for about a year now. I've finally got one that I actually like.

Oven-Fried Chicken

Ingredients:
1 lb chicken drumsticks, skin removed
1 cup buttermilk
2 tablespoons Dijon mustard
1/2 teaspoon salt
1 teaspoon black pepper
1/2 cup whole wheat flour
1/2 cup plain breadcrumbs
1 tablespoon seasoning salt (I used Lawry's) 
1 tablespoon dried thyme 
cooking spray 


Directions:
Preheat oven to 425 F 
Combine buttermilk, Dijon mustard, salt and pepper. Set aside.
Place chicken in a gallon zip top bag. 
Pour buttermilk mixture into zip top bag with chicken. Refrigerate and marinade 30 minutes to 8 hours. 
In a shallow, wide dish (I used an 8x8 cake pan), combine flour, breadcrumbs, seasoning salt, and thyme. 
Toss marinaded chicken in flour mixture until completely coated. Shake of excess flour mixture. 
Grease a baking sheet very well, place a wire rack on top of it, grease it very well, and place drumsticks on rack. Spray each drumstick with cooking spray - it shouldn't be drenched, but the whole thing should look wet. 
Bake 40-50 minutes, until chicken is completely cooked and juices run clear (165 F). 

Tuesday, July 24, 2012

Peanut Butter Banana Breakfast Bars


A couple weeks ago I was travelling to North Carolina for work. It was an early flight and, like every other time I've had an early flight, I couldn't sleep the night before. Typical. 
So, like any rational person would do in that situation, I baked.
I am a couple weeks away from leaving Colorado to go back to Iowa, so I am trying to get as much of my food cooked and gone as possible. I took stock of my kitchen. This included some old bananas, a little oatmeal and honey, and whole wheat flour. I decided on Peanut Butter Banana Breakfast Bars, since I wouldn't have anything for breakfast otherwise.
I had never made them before, but I skimmed a recipe and made changes to use up what I had on hand. That's what you should do. Anything you need to get rid of, just throw it in here. It's a very forgiving recipe.

Peanut Butter Banana Breakfast Bars
adapted from Eat. Drink. Love - Banana Oat Breakfast Cookies

Ingredients:
2 mashed bananas
3/4 cup peanut butter - crunchy or creamy
1/4 - 1/3 cup honey
1/2 cup vegetable oil (or unsweetened applesauce for a low-fat option)
1 tsp vanilla extract 
1 cup rolled oats 
1 cup whole wheat flour
1/2 tsp baking soda
1/2 cup chocolate chips, nuts, or dried fruit (optional)

Directions: 
Preheat oven to 350F.
Combine bananas, peanut butter, honey, oil/applesauce, and vanilla in a bowl. In another bowl combine oats, flour, and baking soda. Slowly add dry ingredients to wet, until a thick batter forms. Stir in any chocolate chips, nuts, or dried fruit. 
Spoon dough on to a greased or parchment lined baking sheet, about 1/4 cup per bar. Form into bars or cookies. Bake 15-20 minutes. 

UPDATE: I have been making these as an rushing off to class/work/meeting breakfasts. I just make  them according to these directions, bake, and put into individual snack-size freezer bags. I can grab one on the way out the door and it's thawed by the time I get where I'm going. I got a little overzealous with the last batch and made 1/3 cup bars, so I've been splitting them in half and pushing them off on my friends. 

Friday, July 20, 2012

Beef Bites

Today is a very exciting day for me. I am at a photo shoot for my first professionally developed recipe. As an intern for the NCBA, I have been involved in the recipe development and testing process throughout the summer. A couple weeks ago I was finally given my own recipe baby. The concept is a beef version of the McNugget, but using beef cube steak instead of chicken...whatever-nuggets-are-made-of. This recipe will soon be up on http://www.beefitswhatsfordinner.com/, after testing and nutritional analysis have been completed.


Beef Bites
Ingredients:
1 lb cube steak
1/2 cup flour
1/2 tsp salt (optional)
1 tsp pepper
2 whole eggs or 3 egg whites
3 cups crushed potato chips - I recommend ruffle-style chips

Directions:
Preheat oven to 400F
1. Cut cube steak into 1''x1'' pieces. Set aside.
2. To crush potato chips: put chips in a gallon ziplock bag, leaving a small opening to vent air. Crush using a rolling pin, mallet, or large vodka bottle...whatever you have on hand, to about the size of bread crumbs.
3. In a wide shallow dish, combine flour, salt, and pepper.
4. Put egg and potato chips into seperate wide shallow bowls.
5. Dredge cube steak pieces in flour mix, then egg, then potato chips until fully coated. Place on a greased or parchment lined sheet tray.
6. Bake for 7-10 minutes, until internal temperature reaches 160F.
Pictures will be up soon.

Sunday, July 8, 2012

Kitchen Chaos

This summer I am living in Denver, Co, while I intern with the National Cattlemen's Beef Association. I was really fortunate and found housing with a cousin of a friend. The woman I am living with is really nice and we get along really well. We both love to cook, which is great. Mostly because I didn't have to bring any of my kitchen gadgets or utensils, but it does cause some logistics issues.


Our kitchen is overflowing. Our fridge, freezer, and pantry and are bursting. I'm not complaining, because it's a wonderful thing. However, I really need to go grocery shopping, but there is no where to put anything in my fridge. Cramping my style. 

Iced Coffee Bliss

Sometime last year between three jobs, being a full time student, and planning a wedding, I fell in love with iced coffee. Big time. It filled a void in my life that I thought only sleep could fill. Since then I have been trying to make the perfect "coffee shop" iced coffee at home, because frankly if I could afford to buy iced coffee every day I wouldn't have had three jobs. And I need it every day.
I NEED IT.
We're in love.

Well I finally figured out how to make it. The Pioneer Woman helped me. Do you know the Pioneer Woman? If not, go and meet her. She's a woman by my own heart. But first finish reading this.
I'm cool too.

Before I tell you the right way, here are the two wrong ways and why they are wrong.
1. Brewing fresh coffee and pouring it over ice cubes - bad life choice. The result is basically lukewarm coffee with little ice chunks floating around. Yuck. The melting ice also dilutes the coffee. Double yuck.
2. Brewing coffee, chilling it over night, and drinking it the next morning. This works pretty well and is what I did for a while, but there are a couple problems with it. The main problem I had with this was remembering to brew my coffee every night. The next problem is you are limited to the amount of coffee your coffee pot can hold, which for me and my little baby coffee pot, is 4 cups. This, for me, meant cleaning my coffee pot every day. I hate dishes more than any other chore on earth, so no, thank you.

The magic, glorious right way. 
Cold brewing. Yeah, that's a thing. I had never heard of this until a couple days ago and it solves all my iced coffee problems.


Acquire a pitcher, jug, tupperware dish, pot, or pan. Anything that is water tight and has a tight fitting lid will do. This can be done in larger batches, but the biggest pitcher I have is 2.25 quarts.
Grab your favorite coffee. I chose this one because it comes in these nifty little filter pack pod things, which means I can make it in one container with no strainers or cheesecloth or extra dishes. 

Put your coffee grounds into your pitcher. If you are using coffee pods, just drop the whole thing in. I use 4 coffee pods in my 2.25 quart pitcher. I find that iced coffee needs to be brewed extra strong or that coffee flavor gets lost in the cold sweetness of the final beverage.

Fill your pitcher with water. 

Put on the lid, leave it in the fridge for at least 8 hours. The longer you leave it, the stronger the coffee.

After your coffee has brewed: 
If you are using coffee grounds, get another container, a mesh strainer, and a couple sheets of cheesecloth. Line your strainer with cheese cloth and pour your coffee and grounds through the strainer into your second container. You will have to use a spoon to push out the last drops of coffee from the grounds. After you have squeezed every last drop of liquid gold from the grounds, dispose of them. 
If you are using pods, take them out and throw them away. 
Store your coffee in the fridge until you are ready to make your iced coffee. 


When you are ready to enjoy your coffee, find a glass. 

Fill it half way full with ice. Now if I was the kind of person that planned ahead, I would make frozen coffee cubes, but I'm not. If you wanted to do that, all you would have to do is take some of the coffee you just brewed, pour it in an ice tray, and freeze it.

Fill your glass about 2/3 of the way full with your cold coffee. 
Now you can sweet and dairy this up however you like it, but here is how I do it. 

WARNING: Not for the faint of heart. 

Sweeten your coffee with sweetened condensed milk, also known as nectar of the gods. You could use sugar or coffee creamer, but it just won't give you the same creamy, delicious sweetness. So do it. You won't look back. 
I use about 1 1/2 tablespoons to start with.  
Add milk or half and half. I used milk, because that's what I had on hand, about 2 or 3 tablespoons.
At this point you can add chocolate, vanilla, or hazelnut syrup, if you have those lying around. 
Stir, taste, and adjust coffee, sugar, or cream levels to your liking. 

Oops. You spilled it on the counter. Just lick it off. There's no shame in that, it's delicious.


Saturday, June 23, 2012

Strawberry Peach Cookie Crumble


A few days ago I found strawberries and peaches on sale, so naturally I bought more than any one human can eat. I got home, realized what I had done, and was forced to find a way to use them. My first thought was strawberry peach crisp, but I didn't have any brown sugar or oatmeal. What I did have was all the stuff for lemon sugar cookies. Talk about a match made in heaven.


Give your fruits a rinse. Quarter the strawberries (if they're small, just cut them in half) and give your peaches a coarse chop. Throw those into a bowl with your lemon juice and sugar and mix everything together. Dump it all into a 9x13 inch cake pan. 


In another bowl, combine the dry ingredients and lemon zest for you cookie crumble. Mix well. Using a pastry cutter, cut in the butter until pea-sized crumbles form. Add egg and milk and mix completely. This is a crumble, so it should be dry and, well, crumbly (duh). Distribute crumble evenly over the fruit mixture. 


Bake until golden brown and bubbly. 

Enjoy! 
(It's even better with vanilla ice cream)


Strawberry Peach Cookie Crumble
Filling:
1 pound strawberries, quartered
3 peaches, chopped
juice from 1 lemon (you're going to want the zest from this lemon, so zest it before you juice it)
1/2 c sugar

Lemon Sugar Cookie Crumble:
Adapted from Alton Brown's Sugar Cookies
3 1/2 cups all-purpose flour
3/4 teaspoon baking powder
1/4 teaspoon salt
1 cup sugar
zest from lemon
1 cup unsalted butter, chilled
1 egg, beaten
2 teaspoons milk

Directions
Preheat oven to 375F
Combine filling ingredients a bowl, toss gently to coat fruit in sugar and lemon juice. Pour filling into a 9x13 in greased baking dish.
Combine crumble dry ingredients and lemon zest in a large mixing bowl. Cut in butter using a pastry cutter, until crumble is pea size. Add egg and milk and mix thouroughly. This should look like a crumble, not a dough, so it will be a little dry. Distribute crumble evenly over fruit.
Bake until golden brown, approximately 25 minutes

In the beginning, there was food. And it was good.


I've been trying to start this blog for a while now. Actually I have started it. I have been posting and revising and re-posting this one post months for now. It was just supposed to be a description of me, but I've never been good at talking about myself. So I'm scratching that idea. What I really want to talk about is food.

I've also been struggling to come up with a title. I've thought of title after title and liked each one less than the last. The current title came to me yesterday. I was, once again, trying to name this blog so that I could get this show on the road. I had written down a few titles and finally typed "I'll name this later. What matters now is the FOOD" in the box. Today I shortened it, and there it is - Food Matters, because it's the food that matters, not the title. And if I think of one I like better, I can always rename it later.

I'm not sure where this blog is going to go, but there will be food